Stitches Different Types: A Seamstress Explains Which Seams to Trust
The inside tells the truth. In twelve years of altering bridal gowns and everyday wardrobes, I've learned that the stitches different types hidden inside a seam tell me more than any designer label. Stitches different types can look nearly identical from the outside, but flip a garment inside out and the whole story shows up. Most women don't need to know how to sew. But understanding stitches different types means you stop getting burned by clothes that split after two washes.
At my studio in Richmond, clients often ask why one jacket falls apart while a similar one lasts a decade. My answer usually starts with the stitching. Every one of the stitches different types falls into one of three jobs: joining two pieces of fabric, protecting a raw edge from fraying, or adding detail. The construction under the arm or along the hem decides how well your clothes hold up.
The Workhorse Stitches You'll See Every Day
A deep dive into stitches different types should start with the straight stitch, because it's the foundation for most seams. It's a simple line of thread, most often made by a lockstitch machine. You'll see it on side seams, darts, and topstitching. When you buy a shirt, check the straight stitches around the armhole. If they're small, even, and tight, that's a good sign. If they're long and loose, the seam will pull apart.
Then there's the zigzag stitch. That side-to-side line you see on knit fabrics and around buttonholes stretches with the fabric instead of snapping. A zigzag can also finish a raw edge by wrapping thread around it. If your favorite stretchy top has a hem that never popped, thank the zigzag.
The overlock stitch, sometimes called a serger stitch, is the thread nest you see on the inside of almost every ready-to-wear garment. It uses two to five threads to bind the edge so it doesn't fray. A clean, dense overlock edge means the factory set the tension properly. A loose, wobbly overlock edge means trouble later.

You'll also find blind hem stitches on dress trousers and skirts. From the outside they look almost invisible; from the inside they form a ladder-like loop that catches the fabric only occasionally. It's a clever way to hem a garment without a stiff line showing.
What Stitch Quality Tells You
Here's where the inside tells the truth. Two garments can use identical stitches different types, and one will still outlast the other. The difference is quality.
Look at the thread. Cheap garments often use low-quality polyester thread that feels waxy and breaks easily. A well-made piece uses cotton-wrapped polyester or spun polyester with a slightly matte finish. Look at the stitch length. A straight seam should have about ten to twelve stitches per inch. Anything longer is a sign of rushed production. Then look at the seam allowance. A garment with a narrow, raw seam allowance won't survive repeated washing. A proper seam allowance is at least five-eighths of an inch, finished or overlocked, so the fabric doesn't ravel.
Tension matters too. If the thread is too tight, the fabric puckers. If it's too loose, the seam gaps. Run your finger along a seam. If it feels smooth and lies flat, the machine was set up by someone who cared.
Hand Stitches and Why They're Worth Paying For
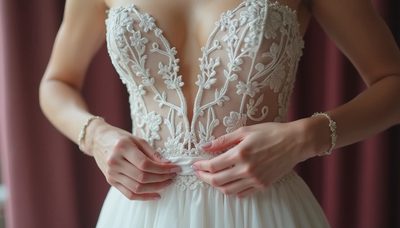
Not all good seams come from a machine. In bridal work, I use hand stitches different types for things like blind-stitching a hem or attaching a lace applique. The most common hand stitches include the backstitch, which locks a seam securely without stretching; the pickstitch, which creates a tiny decorative dot on the outside; and the catch stitch, which holds a hem in place while letting it move. When a jacket has hand-finished buttonholes or a hand-picked lapel, the maker spent real time on it. That's why tailoring costs more, and why it usually fits better over time.
How to Test Stitches Before You Buy
You don't need a magnifying glass to spot poor stitching. When you're in a store, turn the garment inside out. Pick a seam that takes stress, like the inseam of jeans or the side seam of a dress. Stretch it gently. If you see gaps between the stitches or feel thread snapping, put it back. Run your thumb along the seam. If it doesn't lie flat, the tension is off.
Check the hem next. A good hem on woven fabric is either rolled, overlocked, or folded twice and stitched. If the raw edge is just cut and left alone, it will fray the first time it's washed. Buttonholes are another giveaway. A machine-made buttonhole should be dense and smooth. If you see puckering around it, that button won't stay put.
One more trick: look at the thread ends. Quality garments anchor their seams so thread doesn't pull out on the first wear. If you see long dangling threads inside, the finishing was rushed. That piece may still work for a season, but it tells you how much the maker respected the garment.
The Bottom Line
Maybe this sounds like more than you wanted to know. But here's what I tell every client: you don't need to become a seamstress, you just need a mental checklist. When you're deciding between two similar dresses, turn them inside out. Look at the seams, the thread, and the finish. The inside tells the truth. The right stitches different types will hold you, move with you, and last through years of wear. The wrong ones will give way at the worst possible moment.
Stitches different types are the kind of plain-English education I wish every shopper had before spending money on clothes. You don't need to memorize every stitch pattern. Just learn to recognize the basic ones and what they should look like when they're done well. That one habit will save you more money over a lifetime than any sale.


No notes yet — write the first one.